
Securing your website is crucial. One key step is configuring SSL certificates.
SSL certificates protect data, ensuring safe communication between browsers and servers. They help build trust with visitors. Configuring an SSL certificate for your domain might seem complex, but it’s essential for online security. With SSL, your site gains credibility and protects sensitive information.
This guide will walk you through the process, making it easy to understand and implement. Ready to secure your website? Let’s dive in.
Introduction To Ssl Certificates
SSL certificates are essential for securing websites. They ensure data is encrypted and safe. Configuring SSL for your domain can seem complex. This guide will simplify the process.
Importance Of Ssl
SSL certificates protect sensitive information. They build trust with users. They also boost your website’s search engine ranking. Google prefers secure sites. A secure site has “HTTPS” in the URL. This tells visitors their connection is safe.
How Ssl Works
SSL stands for Secure Sockets Layer. It encrypts data between the server and the user. This makes it hard for hackers to access the information. The process starts with a handshake. The server and user exchange keys. These keys create a secure connection. Information can then be safely transferred.
Choosing The Right Ssl Certificate
Choosing the right SSL certificate for your domain is crucial. It ensures data security and builds trust with your visitors. Not all SSL certificates are the same. Understanding your options helps you make the best choice. This section will guide you through the types of SSL certificates and important factors to consider.
Types Of Ssl Certificates
There are several types of SSL certificates. Each serves different needs and levels of security. Here are the main types:
Domain Validated (DV) SSL Certificates: These are basic certificates. They validate only the domain’s ownership. Suitable for small websites and blogs. They are easy to get and cost less.
Organization Validated (OV) SSL Certificates: These certificates provide a higher level of security. They validate the organization’s identity. Suitable for business websites. They are more secure than DV certificates.
Extended Validation (EV) SSL Certificates: These provide the highest level of security. They offer the most thorough validation process. Suitable for e-commerce and financial websites. They display a green address bar in browsers.
Wildcard SSL Certificates: These certificates secure a domain and its subdomains. Useful for websites with multiple subdomains. They save cost and simplify management.
Multi-Domain SSL Certificates: These secure multiple domains with a single certificate. Suitable for businesses with various domain names. They are cost-effective and easy to manage.
Factors To Consider
Consider several factors before choosing an SSL certificate. These factors will help you decide the best option for your needs:
Purpose of Your Website: Identify the purpose of your website. A blog needs less security than an e-commerce site.
Budget: Determine your budget. DV certificates are cheaper. EV certificates are more expensive but provide higher security.
Number of Domains and Subdomains: If you have multiple domains or subdomains, consider Wildcard or Multi-Domain SSL certificates.
Trust Level: Higher trust levels come from EV and OV certificates. They are important for businesses and e-commerce sites.
Validation Time: DV certificates take less time to issue. EV certificates take longer due to thorough validation.
Each factor helps you decide the best SSL certificate for your domain. Choosing the right one ensures your site is secure and trusted by visitors.
Generating A Certificate Signing Request (csr)
Generating a Certificate Signing Request (CSR) is a crucial step. It helps in securing your website with an SSL certificate. A CSR contains information about your domain and organization. This information is required by the Certificate Authority (CA). The CA uses it to issue your SSL certificate. Understanding how to generate a CSR will make the process smooth.
What Is Csr?
A Certificate Signing Request (CSR) is a block of encoded text. It contains details like your domain name, organization, and location. This data is essential for the CA to validate your identity. The CSR also includes a public key. This key will be part of your SSL certificate. The CSR does not include the private key, which remains secure on your server.
Steps To Generate Csr
Generating a CSR involves a few simple steps. These steps may vary slightly depending on your web server. Here are the basic steps:
- First, log in to your web server.
- Next, navigate to the security section.
- Find the option to generate a new CSR.
- Enter your domain name and organization details.
- Provide your public key information.
- Click the generate button.
- Save the generated CSR file to your computer.
Once you have your CSR file, you can submit it to the CA. They will use the information to issue your SSL certificate.
Credit: help.foleon.com
Submitting The Csr To The Certificate Authority
Submitting the CSR to the Certificate Authority is a crucial step in obtaining an SSL certificate for your domain. This process involves selecting a Certificate Authority (CA) and submitting your Certificate Signing Request (CSR) to them. Below, we break down the steps involved in this process.
Selecting A Certificate Authority
First, you need to choose a trusted Certificate Authority. Popular options include:
- Comodo
- Symantec
- Let’s Encrypt
- GlobalSign
Consider the level of security and the support each CA offers. Also, compare prices and features to find the best fit for your needs.
Csr Submission Process
Once you’ve chosen a CA, follow these steps to submit your CSR:
- Generate the CSR using your web server or a CSR generation tool.
- Log in to your chosen CA’s website.
- Navigate to the SSL certificate purchase page.
- Paste your CSR into the provided field.
- Fill out any additional required information, such as your domain name and contact details.
- Submit the form and complete the payment process, if applicable.
After submission, the CA will verify your information. This may take a few minutes to a few days, depending on the CA and the type of certificate.
Installing The Ssl Certificate On Your Server
Installing the SSL certificate on your server ensures your website is secure. It encrypts data between your server and users’ browsers. This step is critical for protecting sensitive information. Follow the steps below to correctly install your SSL certificate.
Server Types And Installation Methods
Different servers require different SSL installation methods. Apache, Nginx, Microsoft IIS, and others each have specific steps.
For Apache servers, you need to edit the configuration file. Locate the httpd.conf or ssl.conf file. Insert your certificate paths and restart the server.
On Nginx servers, edit the nginx.conf file. Specify the certificate and key file locations. Save changes and reload Nginx.
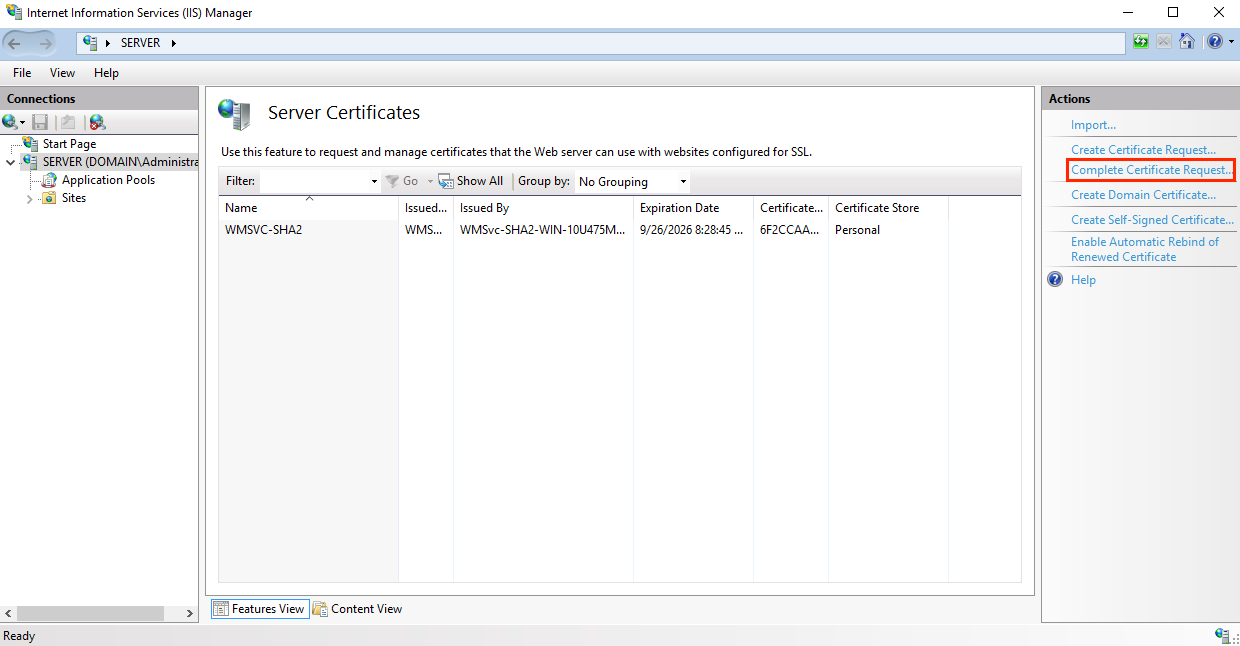
For Microsoft IIS, use the IIS Manager. Go to the “Server Certificates” section. Import your certificate and bind it to your site.
Always refer to your server documentation for specific instructions. Each server has unique configuration files and commands.
Common Installation Issues
Issues can arise during SSL installation. Incorrect file paths are a common problem. Ensure you specify the correct locations for your certificate and key files.
Permission errors also occur frequently. Verify that your server has read access to the certificate files.
Sometimes, the server may fail to restart. Check your configuration files for syntax errors. Even a small mistake can prevent the server from running.
If your browser shows an untrusted certificate warning, the certificate chain might be incomplete. Ensure you include all necessary intermediate certificates.
Refer to error logs for troubleshooting. They often provide clues about what went wrong during installation.
By addressing these common issues, you can ensure a smooth SSL installation process. A secure website builds trust with your users and protects their data.
Credit: www.digicert.com
Configuring Your Web Server To Use Ssl
Securing your website with SSL is crucial. It ensures data encryption between your server and users. Configuring your web server to use SSL is an essential step. This guide will show you how to set up SSL on Apache and Nginx servers. Follow these steps to enhance your website’s security.
Apache Configuration
To enable SSL on an Apache server, follow these steps:
- Install the SSL module:
- Restart Apache:
- Create a directory for the SSL certificate:
- Copy your SSL certificate and key:
- Edit the default SSL configuration file:
- Update the configuration file:
- Enable the SSL site configuration:
- Restart Apache:
sudo a2enmod sslsudo systemctl restart apache2sudo mkdir /etc/apache2/sslsudo cp your_domain.crt /etc/apache2/ssl/
sudo cp your_domain.key /etc/apache2/ssl/sudo nano /etc/apache2/sites-available/default-ssl.conf
    ServerAdmin webmaster@your_domain.com
    ServerName your_domain.com
    DocumentRoot /var/www/html
    SSLEngine on
    SSLCertificateFile /etc/apache2/ssl/your_domain.crt
    SSLCertificateKeyFile /etc/apache2/ssl/your_domain.key
sudo a2ensite default-ssl.confsudo systemctl restart apache2Nginx Configuration
To configure SSL on an Nginx server, follow these steps:
- Install the Nginx package:
- Create a directory for the SSL certificate:
- Copy your SSL certificate and key:
- Edit the Nginx configuration file:
- Update the server block:
- Restart Nginx:
sudo apt-get install nginxsudo mkdir /etc/nginx/sslsudo cp your_domain.crt /etc/nginx/ssl/
sudo cp your_domain.key /etc/nginx/ssl/sudo nano /etc/nginx/sites-available/defaultserver {
listen 443 ssl;
server_name your_domain.com;
ssl_certificate /etc/nginx/ssl/your_domain.crt;
ssl_certificate_key /etc/nginx/ssl/your_domain.key;
location / {
root /var/www/html;
index index.html index.htm;
}
}sudo systemctl restart nginxBy following these steps, you can configure SSL on your web server. It will help ensure secure connections for your users.
Testing Your Ssl Configuration
After setting up your SSL certificate, it’s important to test the configuration. This ensures your website is secure and works properly. Testing helps identify any issues before your visitors encounter them.
Tools For Testing Ssl
Several tools are available to test your SSL configuration. These tools analyze your SSL setup and provide detailed reports. Some popular tools are SSL Labs’ SSL Test, Qualys SSL Test, and DigiCert SSL Installation Diagnostics Tool.
Each tool checks for common issues. They look for things like expired certificates, insecure connections, and proper certificate chains. Using these tools can help you maintain a secure website.
Interpreting Test Results
After running the tests, you will receive a report. The report may seem technical at first. Look for key sections like protocol support, key exchange, and cipher strength.
Ensure that your protocol support includes the latest versions. Outdated protocols can be insecure. The key exchange section should show strong algorithms. Weak algorithms can be a security risk.
Finally, check the cipher strength. Strong ciphers protect data better. If any issues are found, the report will offer suggestions. Follow these to improve your SSL configuration.
Credit: help.gohighlevel.com
Renewing And Updating Ssl Certificates
Renewing and updating SSL certificates is a crucial task for maintaining your website’s security. SSL certificates encrypt data between your site and its visitors. This ensures sensitive information stays secure. Neglecting to renew your SSL certificate can lead to expired certificates. These can cause trust issues and potential security risks. It is essential to understand the renewal process and its timeline.
When To Renew
SSL certificates have a limited lifespan. Most certificates expire in one year. Some may last up to two years. Always monitor your certificate’s expiration date. Start the renewal process at least 30 days before expiry. This ensures a seamless transition without security lapses. Many providers send renewal reminders. Keep an eye on these notifications.
Renewal Steps
Renewing an SSL certificate involves several steps. Follow this guide to ensure a smooth renewal.
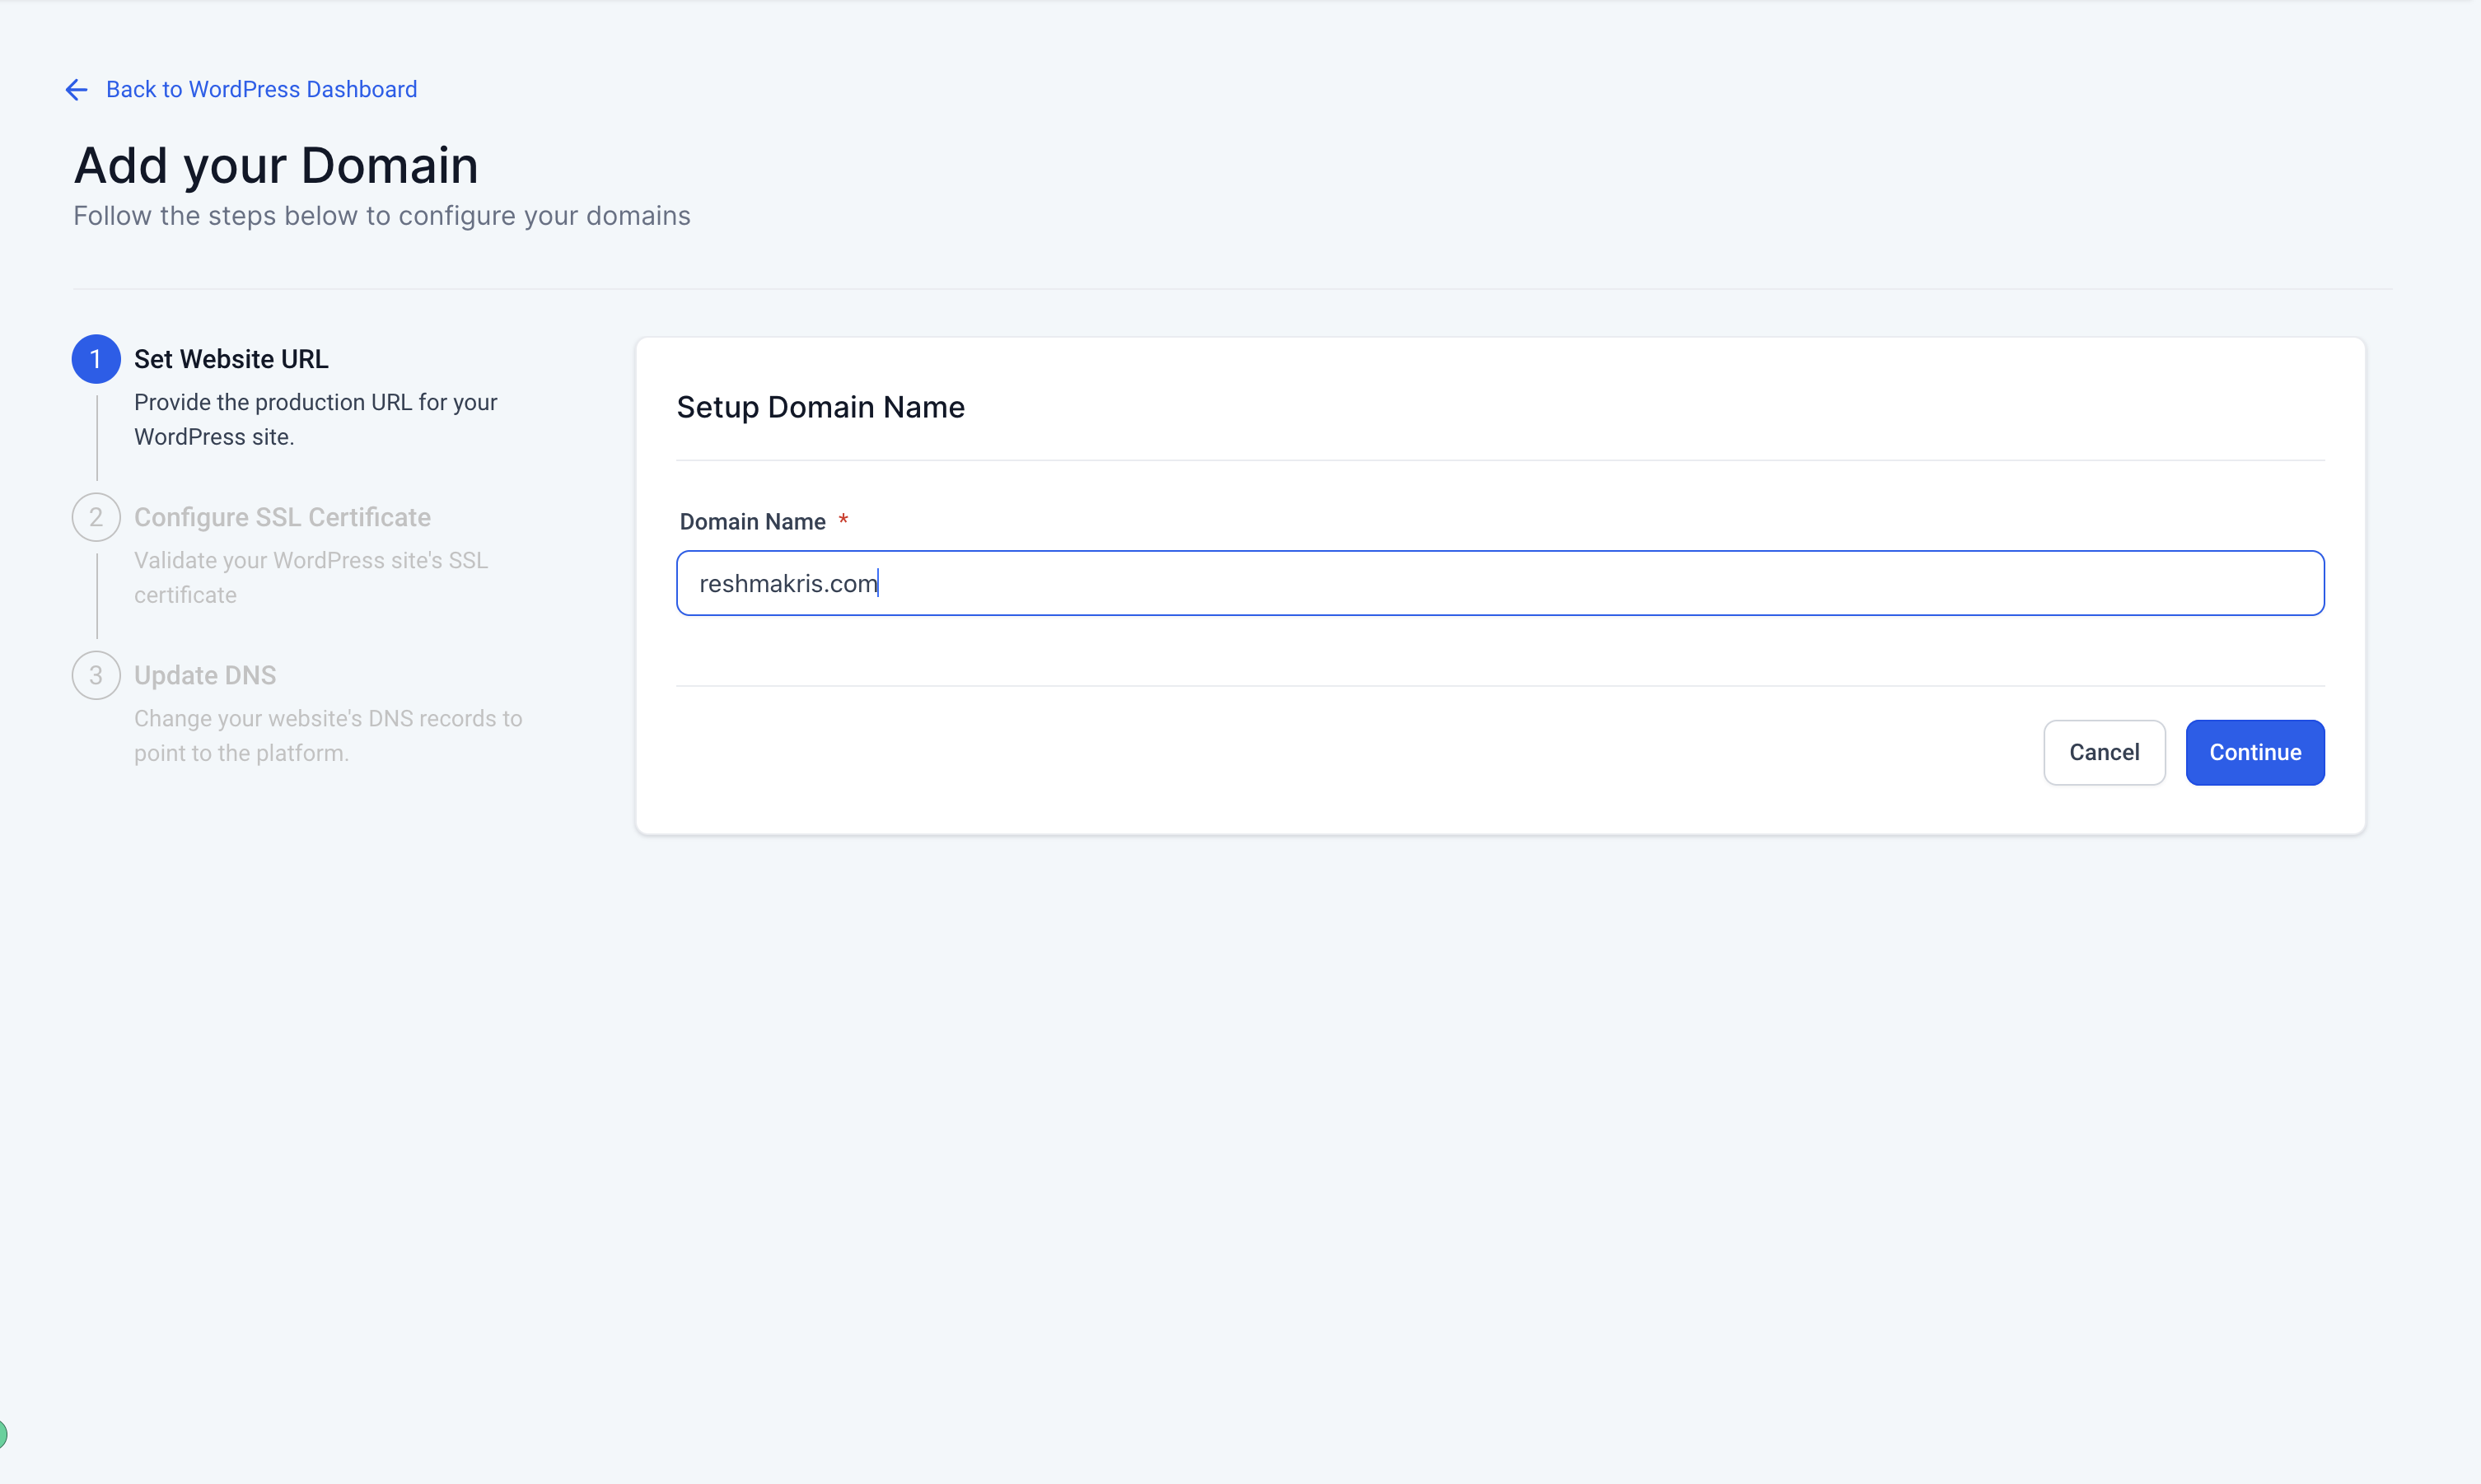
- Check Expiry Date: Log into your hosting or SSL provider’s dashboard. Locate the expiration date of your certificate.
- Backup Current Certificate: Save a copy of your current SSL certificate. This is a precautionary step.
- Purchase Renewal: Buy the renewal from your SSL provider. Ensure it matches the type and validity period of your current certificate.
- Generate CSR: Create a Certificate Signing Request (CSR) from your server. This validates your domain and organization.
- Submit CSR: Send the CSR to your SSL provider. They will issue the renewed certificate.
- Install New Certificate: Replace the old certificate with the new one on your server. Follow your hosting provider’s instructions.
- Update Configuration: Ensure your server configuration points to the new certificate files.
- Test Installation: Use online tools to check if your SSL certificate is correctly installed. Ensure there are no errors.
The table below summarizes the renewal steps:
| Step | Description |
|---|---|
| Check Expiry Date | Find the expiration date in your hosting or SSL dashboard. |
| Backup Current Certificate | Save a copy of the existing certificate as a precaution. |
| Purchase Renewal | Buy the renewal from your SSL provider. |
| Generate CSR | Create a Certificate Signing Request from your server. |
| Submit CSR | Send the CSR to your SSL provider. |
| Install New Certificate | Replace the old certificate with the new one on your server. |
| Update Configuration | Ensure server settings point to the new certificate files. |
| Test Installation | Check if the new SSL certificate is installed correctly. |
Frequently Asked Questions
What Is An Ssl Certificate?
An SSL certificate encrypts data between your website and visitors. It ensures secure communication. It also helps in gaining user trust.
How Do I Get An Ssl Certificate?
You can get an SSL certificate from a Certificate Authority. Some popular providers are Let’s Encrypt, Comodo, and DigiCert.
Why Is Ssl Important For My Domain?
SSL is important because it secures data transmission. It also boosts your website’s SEO ranking and builds user trust.
How Do I Install An Ssl Certificate?
To install an SSL certificate, you need access to your server. Follow the specific instructions provided by your hosting provider.
Conclusion
Configuring SSL certificates is crucial for your domain’s security. Follow the steps outlined. This ensures your data remains protected. SSL certificates also build trust with visitors. They see your site as secure. Most importantly, this process boosts your SEO ranking.
Search engines favor secure sites. Start securing your domain today. It’s simpler than you think. Your users will thank you. And your site will perform better. Stay safe and secure online.