
Changing nameservers for a domain is a straightforward process. It involves updating the settings that point your domain to the correct web host.
This ensures your website is accessible to visitors. If you’re new to managing domains, the term “nameservers” might sound technical. But don’t worry, changing nameservers is simpler than it sounds. Nameservers are like the phone book for the internet. They direct web traffic to the right place.
When you change them, you ensure your domain points to the correct host. This process is essential when you switch hosting providers or set up a new website. In this guide, we’ll walk you through the steps to change nameservers, ensuring your site runs smoothly. Let’s get started!

Credit: www.hostinger.com
Pre-change Preparations
Before changing nameservers for your domain, it’s important to make some preparations. These steps will help ensure a smooth transition with minimal disruption. Taking the time to prepare can save you from potential issues.
Check Domain Registrar
First, identify your domain registrar. This is the company where your domain is registered. You can usually find this information in the account where you manage your domain. Knowing your registrar is crucial because the process to change nameservers can vary slightly between different registrars.
Backup Existing Settings
Next, backup your current DNS settings. This step is vital in case something goes wrong. Note down or take screenshots of the existing nameserver entries. This way, you can easily revert to the original settings if needed. Keeping a backup ensures you have a fallback option.
Accessing Domain Registrar
Changing nameservers for a domain is essential for managing your website’s DNS settings. The first step involves accessing your domain registrar’s control panel. This is where you manage your domain’s settings and configurations. Let’s break this down into simple steps, so you can follow along easily.
Logging Into Account
To begin, log into your domain registrar account. Go to the registrar’s website and click on the login button. Enter your username and password. If you have forgotten your password, use the password recovery option.
After logging in, you will be directed to your account dashboard. This is where you can see all your domains and their settings.
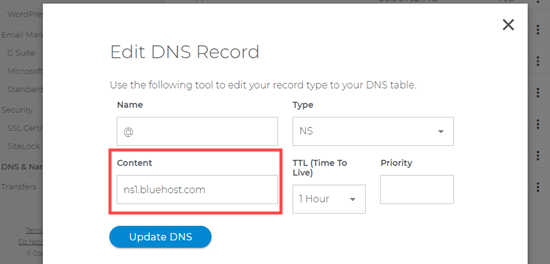
Navigating To Dns Settings
Once you are in your account dashboard, locate the DNS settings. This option is usually found in the domain management section. Look for a menu or tab labeled “DNS”, “DNS Management”, or “DNS Settings”.
Here is a table to help you understand common labels used by different registrars:
| Registrar | DNS Settings Label |
|---|---|
| GoDaddy | DNS Management |
| Namecheap | Advanced DNS |
| Bluehost | DNS Zone Editor |
Click on the relevant label to access your domain’s DNS settings. You will see your current nameservers and other DNS records.
To change your nameservers, look for an option to edit or modify the nameservers. This is typically a button or link next to the current nameserver settings.
Finding New Nameservers
Changing nameservers can seem tricky. But with the right guidance, it becomes easy. The first step is to find the new nameservers. This involves a few simple steps. Let’s dive in.
Getting Details From Hosting Provider
Your hosting provider will give you the new nameserver details. Check your welcome email. This email usually contains the nameserver information. If you can’t find it, log in to your hosting account. Look for a section labeled “DNS settings” or “Nameservers”. Here, you will find the required details.
Verifying New Nameservers
It’s important to verify the new nameservers. This ensures they are correct. Incorrect nameservers will cause problems. To verify, you can use online tools. These tools check the nameserver details. Ensure the nameservers point to your hosting provider. If unsure, contact your hosting support. They can confirm the details for you.
Credit: www.wpbeginner.com
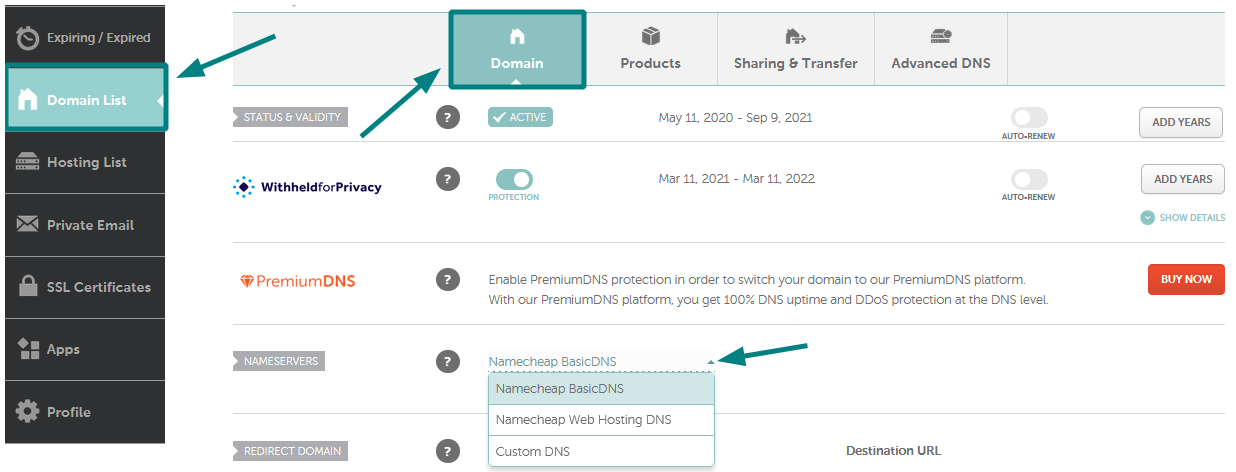
Updating Nameservers
Changing nameservers for a domain is a crucial step in managing your website. It allows you to point your domain to the correct hosting provider. This process can seem daunting, but with step-by-step guidance, it becomes quite simple. Let’s dive into the process of updating nameservers.
Entering New Nameservers
First, log in to your domain registrar’s control panel. This is the service where you purchased your domain.
Look for the section labeled “DNS Settings” or “Nameserver Management”. You may need to navigate through a few menus to find this.
Once you are in the correct section, you will see fields to enter your new nameservers. These are usually provided by your hosting provider.
- Nameserver 1 (Primary):
- Nameserver 2 (Secondary):
Ensure you enter the nameservers correctly. A small typo can cause issues with your website’s accessibility.
Saving Changes
After entering the new nameservers, look for a “Save” button or a similar option to apply the changes.
Click on this button to save your new settings. You might see a confirmation message indicating that the changes were successful.
It can take up to 48 hours for DNS changes to propagate. During this time, your website may be temporarily inaccessible.
Changing nameservers is a straightforward process but requires careful attention. By following the steps outlined above, you can ensure a smooth transition for your domain.
Post-change Verification
After changing your nameservers, it’s crucial to verify that the changes have taken effect. This process ensures that your domain is properly pointing to the new server. Let’s walk through the steps to confirm your nameserver changes.
Checking Dns Propagation
Once you update your nameservers, it can take some time for the changes to propagate across the internet. This process is known as DNS propagation and can take up to 48 hours.
- Use online tools like What’s My DNS to check the status.
- Enter your domain name and see if the new nameservers are active.
These tools show you the status from multiple locations worldwide. If you see the new nameservers listed, propagation is complete.
Testing Website Accessibility
After confirming DNS propagation, test your website’s accessibility. This step ensures visitors can reach your site without issues.
- Open a web browser and type your domain name.
- Hit Enter and check if your website loads correctly.
If your site loads, the nameserver change was successful. If not, clear your browser cache and try again. Still having issues? Check your hosting provider’s settings.
Remember, verifying your nameserver changes is essential. It ensures your domain works correctly and visitors can access your site without problems.
Troubleshooting Common Issues
Changing nameservers for a domain can sometimes lead to issues. Troubleshooting these common problems can save time and stress. This section will help you resolve the most frequent issues.
Propagation Delays
One common issue is propagation delays. After updating nameservers, it can take time to reflect. This process, known as DNS propagation, may take up to 48 hours. During this period, your site may not be accessible. Be patient and check back after some time.
Incorrect Nameserver Entries
Another issue is incorrect nameserver entries. Double-check the nameserver details you entered. Small mistakes can cause big problems. Ensure you copied and pasted the correct information. Confirm with your hosting provider if you’re unsure.
Credit: www.namecheap.com
Frequently Asked Questions
How Do I Find My Current Nameservers?
To find your current nameservers, log in to your domain registrar’s dashboard. Look for the DNS or Domain settings. Your nameservers will be listed there.
Can I Change Nameservers For Free?
Yes, you can change nameservers for free. Most domain registrars provide this service at no additional cost. Simply follow their instructions.
How Long Does It Take To Change Nameservers?
Changing nameservers can take up to 48 hours. This process, known as DNS propagation, ensures the changes are updated globally.
Do I Need Technical Skills To Change Nameservers?
No, you don’t need technical skills to change nameservers. Most registrars provide a simple, step-by-step guide to help you.
Conclusion
Changing nameservers for a domain is simpler than it seems. Follow the steps outlined above. This process ensures your domain points to the right server. Always double-check the nameserver details. Mistakes can lead to downtime. Remember, patience is key. The changes might take up to 48 hours to propagate.
Keep your domain management details handy. This can save time and avoid confusion. By managing your nameservers, you gain better control over your domain. Happy managing!