
Connecting a domain to web hosting is essential for your website. It helps your site go live on the internet.
This process might seem complicated, but it is quite simple. In this guide, you will learn the steps to connect your domain to web hosting. Whether you are a beginner or have some experience, this information will help you get your website online.
Understanding this process is crucial for anyone looking to build an online presence. By the end of this blog post, you will be able to connect your domain to your web hosting with ease. Let’s dive in and make your website accessible to the world!
Choosing A Domain Name
Choosing a domain name is an essential part of creating a website. Your domain name is how users will find your site. It also helps build your brand. A good domain name is easy to remember. It should reflect your business or content.
Brainstorming Ideas
Start by brainstorming ideas for your domain name. Think about your business or website’s purpose. Make a list of keywords related to your content. Short and simple names are best. Avoid using numbers or hyphens. They can confuse users.
Checking Availability
After you have some ideas, check if they are available. Use a domain registration site to search. This will show if your chosen name is taken. If it is, try a different extension like .net or .org. Or, tweak your name slightly. You can also use online tools to suggest similar names.
Registering Your Domain
Registering your domain is the first step to create your online presence. A domain name represents your brand or business on the web. You must choose a reliable registrar to ensure your domain name is secure and easy to manage.
Selecting A Registrar
Selecting a registrar is crucial. A registrar is a company that manages the reservation of domain names. There are many registrars available, each offering different features and pricing.
Consider the following factors:
- Pricing: Compare prices to find a cost-effective option.
- Customer Support: Ensure they offer 24/7 support.
- Additional Services: Look for extra features like email hosting.
- Domain Management Tools: Check if they provide easy-to-use tools.
Popular registrars include GoDaddy, Namecheap, and Google Domains. Choose a registrar that fits your needs and budget.
Completing The Purchase
Once you select a registrar, the next step is to complete the purchase. Follow these steps:
- Search for Your Domain Name: Use the registrar’s search tool to check if your desired domain is available.
- Add to Cart: If the domain is available, add it to your cart.
- Choose the Registration Period: Decide how long you want to register the domain (usually 1-10 years).
- Enter Your Information: Provide your contact information. This includes your name, email, and address.
- Select Additional Services: Choose any extra services like domain privacy protection.
- Complete Payment: Enter your payment details and confirm the purchase.
After completing these steps, you will receive a confirmation email. This email will contain important information about your new domain. Save this email for future reference.
Now that you have registered your domain, you can proceed to connect it to your web hosting. This will involve configuring DNS settings and setting up your hosting account.
Selecting A Web Hosting Provider
Choosing a web hosting provider is a critical step in connecting your domain to your website. The right provider ensures your site runs smoothly, securely, and efficiently. Let’s explore the different types of hosting and how to compare their features to make an informed decision.
Types Of Hosting
Understanding the various types of web hosting is essential. Each type has its unique features and benefits. Here are the main types:
- Shared Hosting: Multiple websites share the same server resources. It’s cost-effective and suitable for small websites.
- VPS Hosting: Virtual Private Server provides dedicated resources on a shared server. It offers more control and better performance than shared hosting.
- Dedicated Hosting: You get an entire server for your website. It offers maximum control and performance but at a higher cost.
- Cloud Hosting: Websites are hosted on a network of servers. It offers scalability and reliability, ideal for growing websites.
- WordPress Hosting: Optimized specifically for WordPress sites. It offers better performance and security for WordPress users.
Comparing Features
Once you know the types of hosting, compare their features. Look for these key aspects:
| Feature | Importance |
|---|---|
| Uptime Guarantee | Ensures your site is always available. Look for 99.9% or higher. |
| Customer Support | 24/7 support is crucial. Check for multiple support channels like chat, phone, and email. |
| Security Features | Includes SSL certificates, DDoS protection, and regular backups. Essential for site safety. |
| Scalability | Allows your website to grow. Look for easy upgrade options. |
| Bandwidth and Storage | More is better. Ensure it meets your site’s needs. |
| Pricing | Balance cost with features. Look for value for money. |
By understanding hosting types and comparing features, you can select the best web hosting provider for your needs. This ensures your website performs well and is secure, providing a positive experience for your visitors.
Credit: m.youtube.com
Purchasing A Hosting Plan
Connecting a domain to web hosting starts with purchasing a hosting plan. This step is crucial for your website’s performance and reliability. Let’s break down the process into simple steps.
Choosing A Plan
First, you need to choose a hosting plan that suits your needs. Hosting providers offer various plans with different features. Here are some common types:
- Shared Hosting: Multiple websites share the same server. Ideal for small websites.
- VPS Hosting: A virtual private server with dedicated resources. Suitable for medium-sized websites.
- Dedicated Hosting: A server solely for your website. Best for large websites with high traffic.
- Cloud Hosting: Websites use resources from multiple servers. Great for scalability.
Compare the features of each plan. Look at storage, bandwidth, and customer support. Decide which plan fits your budget and requirements.
Finalizing The Purchase
Once you have chosen a plan, it’s time to finalize the purchase. Follow these steps:
- Create an account on the hosting provider’s website.
- Enter your personal details like name, email, and address.
- Select the hosting plan you want to buy.
- Choose the billing cycle: monthly, yearly, or multi-year.
- Add any extras like domain privacy or SSL certificates.
- Review your order summary and make sure everything is correct.
- Complete the payment using your preferred method.
After the purchase, you will receive a confirmation email. This email will contain details about your hosting account. Keep this information safe for future reference.
Accessing Your Hosting Account
Before connecting your domain to web hosting, you need to access your hosting account. This step ensures you can manage your website’s settings, files, and features. Let’s break this down into simple steps.
Logging In
First, log in to your hosting account. Visit your hosting provider’s website. Look for the “Log In” button. Enter your username and password. If you forget your password, use the “Forgot Password” link. Follow the instructions to reset it.
Navigating The Dashboard
Once logged in, you will see the dashboard. The dashboard is your control panel. It helps you manage your website. Look for sections like “Domains,” “Email,” and “Files.” Click on the “Domains” section to begin connecting your domain.
Familiarize yourself with the dashboard. Explore different sections. This will help you understand where to find important settings. Remember, each hosting provider may have a different layout.
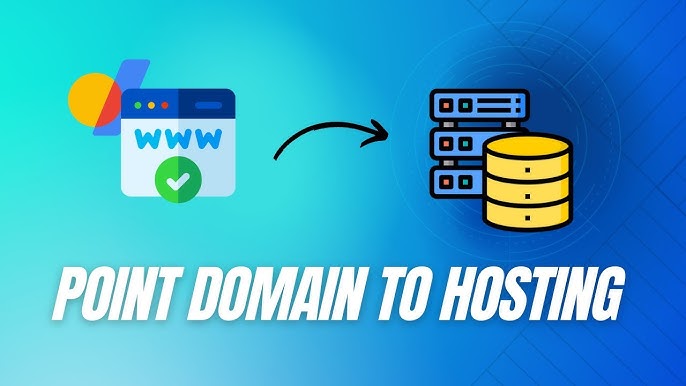
Linking Domain To Hosting
Linking your domain to your web hosting is crucial. It ensures your website is accessible online. This process involves a few steps. Let’s walk through them to make it simple for you.
Updating Dns Records
Your DNS records tell the internet where to find your website. Start by logging into your domain registrar’s control panel. Look for the DNS settings. You need to update the ‘A’ record. This points your domain to your hosting server’s IP address. Save the changes. These updates might take up to 48 hours to propagate.
Adding Domain To Hosting
Next, log into your hosting account. Find the section to add a new domain. It might be under ‘Domain Management’ or ‘Add Domain’. Enter your domain name. Follow the prompts to complete the setup. Your hosting provider will guide you through this process.
After adding the domain, link it to your website files. Ensure your website files are in the correct directory. This directory is often named ‘public_html’ or similar. Check your hosting provider’s support for exact details.
That’s it! Your domain is now linked to your hosting. Your website should be live soon. If not, contact your hosting support for help. They can assist with troubleshooting any issues.
Testing The Connection
Testing the connection between your domain and web hosting is essential. This ensures everything is set up correctly and your site will be live. Here’s how to do it step by step.
Checking Propagation
First, check if the DNS changes have propagated. DNS propagation can take up to 48 hours. Use online tools like “What’s My DNS” to check the status. Enter your domain name and look at the results. If the IP matches your hosting, the propagation is complete.
Resolving Issues
Sometimes, things do not go as planned. If your domain is not pointing correctly, check the name servers. Ensure they match the ones provided by your hosting provider. Another common issue is incorrect DNS records. Check your A, CNAME, and other records for errors.
Clear your browser’s cache if you still see the old site. This can sometimes fix the issue. Contact your hosting provider if problems persist. They can offer guidance and support.

Credit: www.crazydomains.com
Setting Up Email Accounts
Setting up email accounts is a vital step after connecting your domain to web hosting. It ensures you can send and receive emails using your custom domain. This enhances your brand’s professionalism. Below are the steps to create email addresses and configure email clients.
Creating Email Addresses
To create email addresses, follow these steps:
- Log in to your web hosting control panel.
- Navigate to the Email section.
- Click on “Create” or “Add Email Account.”
- Enter your desired email address and password.
- Select the domain you want to use for the email address.
- Click on “Create” to finalize the process.
Now, your email address is set up. You can create multiple email addresses for different purposes. For example, info@yourdomain.com for general inquiries and support@yourdomain.com for customer support.
Configuring Email Clients
Next, configure your email clients to send and receive emails. Follow these steps:
- Open your email client (e.g., Outlook, Gmail, Thunderbird).
- Go to the account settings or email settings.
- Select “Add Account” or “New Account.”
- Enter your email address and password.
- Choose between IMAP or POP3 for incoming mail.
- Enter the incoming and outgoing server details:
| Setting | Value |
|---|---|
| Incoming Server | mail.yourdomain.com |
| Outgoing Server | smtp.yourdomain.com |
| Port (IMAP) | 993 |
| Port (POP3) | 995 |
| Port (SMTP) | 587 |
After entering the server details, click on “Next” or “Finish” to complete the setup. Your email client should now be configured to send and receive emails.
Setting up email accounts is easy and boosts your domain’s credibility. Follow these steps to ensure seamless email communication.

Credit: www.bluehost.com
Frequently Asked Questions
What Is A Domain Name?
A domain name is your website’s address on the internet. It’s the URL people type to visit your site.
How Do I Connect My Domain To Hosting?
To connect your domain to hosting, update the domain’s DNS settings. Use the nameservers provided by your hosting provider.
How Long Does Domain Connection Take?
Connecting a domain to hosting usually takes 24 to 48 hours. It depends on DNS propagation.
Can I Use Any Domain With Any Host?
Yes, you can use any domain with any hosting provider. Just update the DNS settings accordingly.
Conclusion
Connecting your domain to web hosting is simpler than it seems. Follow the steps carefully. Understand your hosting provider’s instructions. Ensure your domain points to your hosting server. Regularly check for updates and changes. Practice patience as DNS changes can take time.
With these steps, your website will be live soon. Enjoy the process and learn as you go. Happy website building!